


How to cook a chook
And all the things I’ve learnt along the way

Originally, I had planned to make this one email called ‘how to cook and chop a chook’ but it seems I have a lot to say about roasting a humble chicken. And I do mean a humble chicken.
There’s a time and place for a fancy roast chicken. The one where you’ve stuffed it with all sorts of tasty bits, sensually rubbed herbed butter under its skin, lovingly baked and basted it till crisp and juicy. A triumph.
Then there’s this chicken. Still a winner (winner, chicken dinner) and most of the above things but much less of a faff.
So, this week, we cook a chook, next week, we chop a chook.
I find the more I understand why I’m doing something, the more I can see why it’s necessary, the result it produces, and how I can change it up next time. I’m going to show you some things I’ve learnt along the way and how it’s resulted in the chook I cook today. Here are…
Rosie’s six tips for good chicken. In order of doing.
Remove the wishbone. For carving later.
Next week I’ll do a full guide on how I carve a roast chicken but the first step actually starts now.
The wishbone sits right at the front of the chicken's breast and can be a bit obstructive when it comes to separating the breast meat from the bone while carving the chicken after it's cooked.
Added bonus: By taking out the wishbone, you create a flatter surface on the breast, allowing it to cook more uniformly.
Drying the skin. Two ways.
We want that even, golden-brown, crispiness all over, and moisture is enemy number one in this equation. If the skin is moist, it can steam, resulting in uneven browning and potentially flabby skin. And like in all facets of life - flabby skin = bad.
There are two ways to achieve this:
The long game: place the chicken on a wire rack set over a baking sheet or a clean plate. This allows air to circulate around the chicken and further helps to dry the skin. Leave the chicken uncovered in the fridge for a few hours or overnight. The dry air in the fridge will aid in removing moisture from the skin.
The short game: use paper towels or a clean kitchen towel to pat the skin dry.
Stuff and truss. For flavour.
I like to stuff and truss the chicken for three reasons. Firstly, it’s a great way of infusing flavour without adding more ingredients to the skin. I find spices and rubs can add flavour but often, they just burn and it’s only surface-level flavour. By stuffing it instead, you benefit from the ingredients infusing the meat from the inside. Secondly, tucking it all in together helps it to cook more evenly. Thirdly, I feel like it gives the poor chook a lil bit of dignity lol.
Salting and sugaring. All over.
This is something that I haven’t really seen other people do but is kinda like hacking dry brining. Salt and sugar are both seasoners. Not necessarily flavouring, but enhancing the flavour of food.
When sprinkled all over, salt draws out some moisture from the skin initially, but then that moisture is reabsorbed by the meat, along with the salt and sugar. Seasoning throughout.
The sugar isn’t enough to actually sweeten but enhances and balances the savoury flavour. It also has the added benefit of caramelising as it cooks which helps with that golden glow.
Also, I don’t pepper. I avoid adding pepper to anything that is going to be exposed to super high heat (I never pepper steak pre cook) as I find it often burns and isn’t pleasant. But we make up for it by adding insane amounts to some mayo on the side - recipe below.
Hot, hot, hot. Then turn it down.
This is a technique pulled from another meat, pork belly. It’s common practice with pork belly to start it at a high temp to remove moisture quickly and start the crisping process. Then turn the oven down to evenly and gently cook the meat. So why not with chicken? It’s an extra step, but it’s small and the timer on your phone does most of the work.
Chicken needs a rest too. Allow at least 20 mins.
Don’t forget to add this to your cooking time, as time in the oven is just as important as time out of it. Resting meat before carving is common practice and the general rule is to let it rest for half the time you cooked it for. Not only for the juices to settle but because that bad boy will be thermonuclear and burn your fingers if you try to chop it too quickly. I recommend 30 mins but you’ll still be fine at the 20-min mark. Don’t worry too much about it cooling down, it’ll hold its heat for at least 30 mins so use that time to crisp potatoes, toss salad, or make your black pepper mayo.
Extra stuff:
There are heaps of other things I could add to this list, bringing the chicken to room temp before cooking, how to make the most of the fond for pan gravy, what the heck even is fond, when to add potatoes etc etc but in the interest of keeping this semi brief, I’ve tried to pick the biggest wins with the smallest effort. Let me know if I’ve missed something you’re interested in. We could always do a part 2!
Oh, ok, one more thing: This may be obvious to you but it wasn’t until I worked at a supermarket that I realised that the way chickens are sized is based on their weight. For example, a size 12 chicken, is on average, 1.2kg. Therefore a size 15 chicken, is 1.5kg and so forth. We’re using a size 15 chicken here as that's the most standard but this recipe works for anything from a size 12, up to a size 18.
Roast chicken with black pepper mayo.

Chicken
1.5kg, or size 15
Stuff
½ lemon
Rosemary stalks
Bay leaves
3 garlic cloves
1 piece of oven-proof string
Sprinkle
1.5 tsp salt
1 tsp sugar
2 Tbsp olive oil
Sauce
1 portion aioli - recipe here, or 1 cup mayonnaise
2 tsp fresh cracked black pepper - it’s a lot, trust me
Preheat your oven to 220c fanbake.
I like to get everything ready before touching the chicken so that once my hands are chickeny, I don’t have to go back and forth, washing and drying. Get out your wire rack (if you have one) and baking tray, pull off a couple of paper towels, prep your stuffing ingredients, cut a piece of string for trussing, and mix together the salt and sugar.
Remove the wishbone from the chicken - full tutorial next week.
Place the chicken on a wire rack, on top of a baking tray, and using paper towels, pat the chicken dry. One at a time, extend the wings out from the body of the bird, twist under, and tuck back underneath.


Add all the stuffing aromatics to the cavity. Bring the legs together and tie them closed. I find it easiest to cross them slightly, do a couple of loops, and then knot the string.
Squirt the olive oil over the chicken and then sprinkle with the salt and sugar. Use your hands to rub it in so everything is oiled and seasoned. Make sure to use it all. It seems like a lot but it’s a big bird, it’ll need it.


Return the chicken to being breast side up. Place it in the preheated oven. Set the timer for 20 mins. When the timer goes off, turn the temperature down to 180c. Don’t peek, we want to keep all that heat in. Set the timer for another 40 mins.
Pull the chicken out of the oven. It’ll be cooked but if you want to check, stick a thermometer in the thickest part of the breast, you’re aiming for 70c.
Leave to rest and relax for at least 20 minutes.


For the sauce, combine the aioli/mayo with fresh cracked black pepper in a bowl.
Carve - next week, next week, have I mentioned we’re doing that next week?
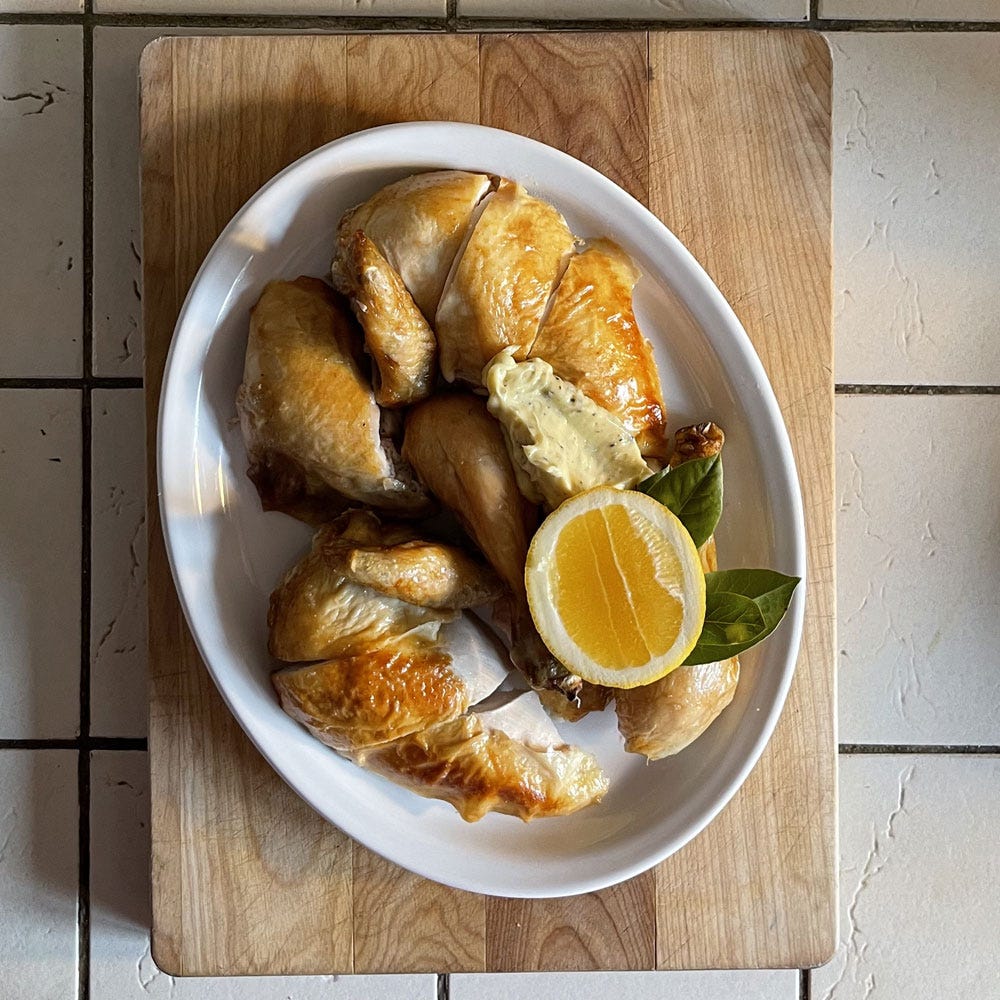
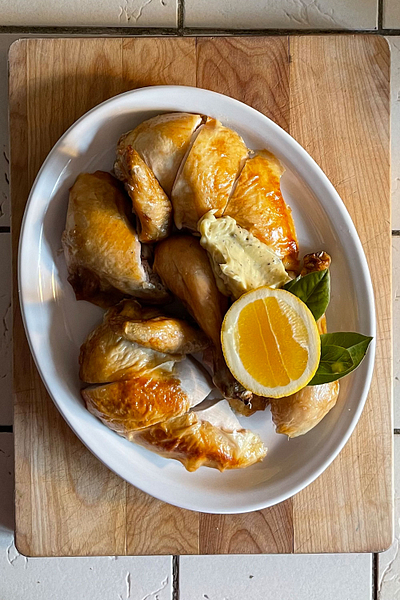
To serve, arrange on a cute plate with a big dollop of black pepper mayo.


Sides:
Nailed this chicken and looking for another variation? This roasted chicken with charred spring onion mayo is perfect for spring and is dream, dream, dreamy. Full recipe here.
Here’s a delicious-looking and beautifully carved chicken from one of my favourite spots in Melbourne, Marion. Notice the leeks? The leeks vinaigrette from last week would be delicious with this.
In terms of sides, I always have a bag of frozen chips in the house. Most cook in the time it takes to rest and carve the chicken and are perfect for dipping in the mayo.
As you can tell, I love an oval-shaped platter so this chopping board is definitely my vibe. Cute enough to not need a platter at all.
That’s it, that’s all. See you next week.
Rosie